Create, Change, or Delete a Filter
Permissions: System admin can create private and personal filters, while other members can create personal filters only.
Now you have the flexibility to create custom filters of tickets to organize and display requests that are most important and add filters to have a more engaging style. You can create a personal filter (that only you can see) or, if you have permissions to do so, you can create a public filter (everyone who uses the app).
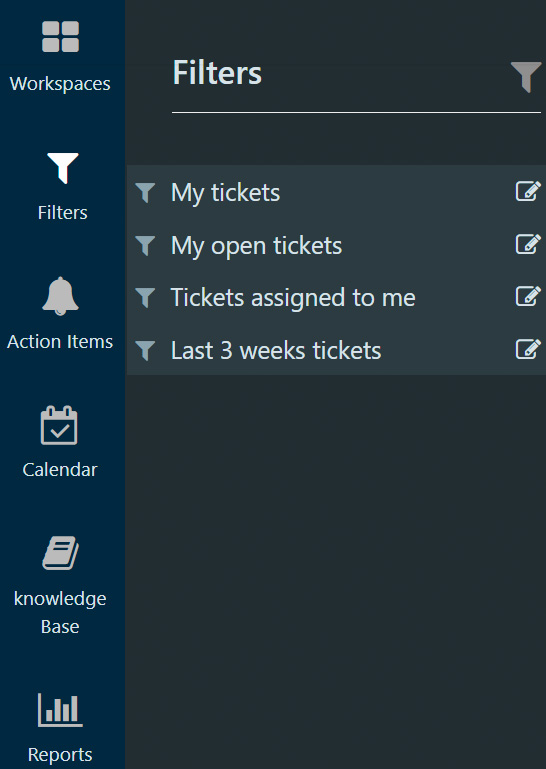
All personal and public filters will show in filters side navigation:
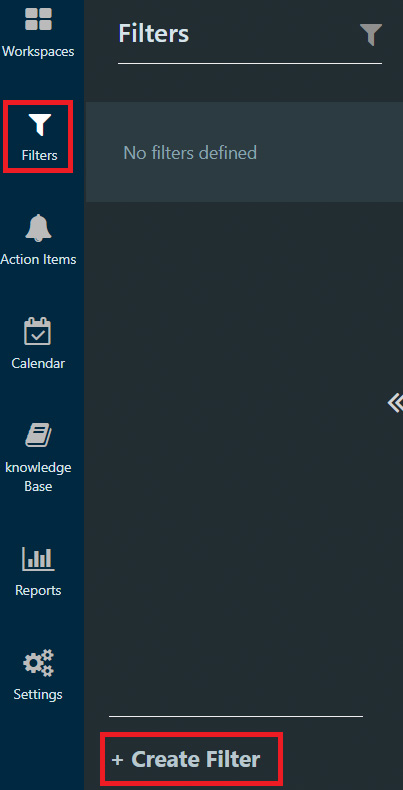
1) Select + Create Filter
You will see all attributes available for customizing the filter
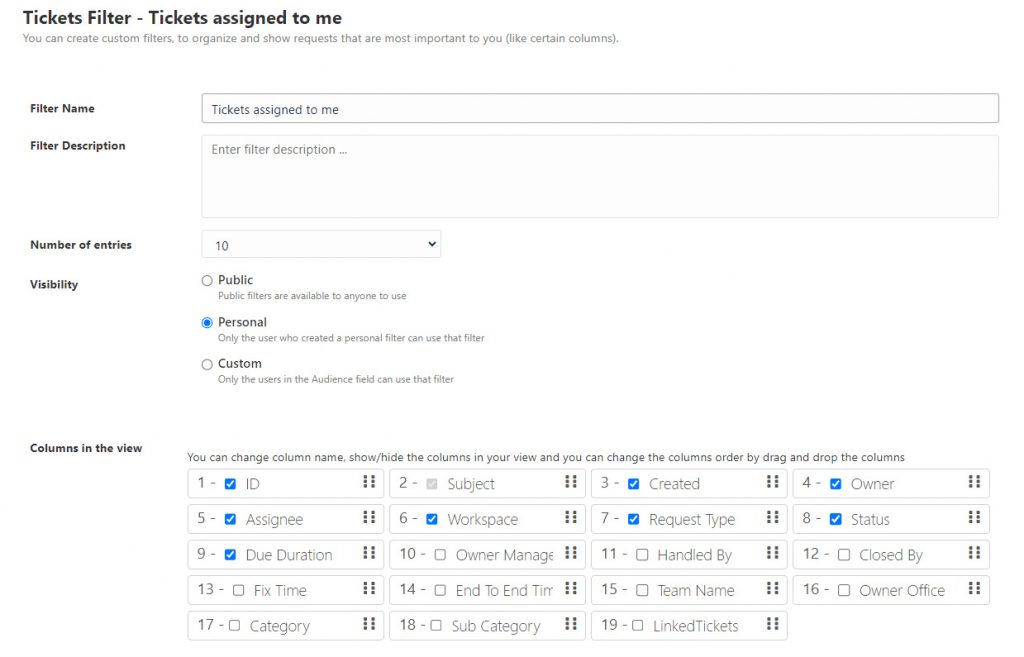
2) Go down to the main filter attributes
- Filter Name: Select a name for the new filter
- Filter Description: Enter an optional description for the filter
- Number of entries: Select the number of entries that will be displayed per page
- Visibility : Choose from 3 options, Public (available for all users), Personal (Only you can see the filter), and Custom (Select users who can use this filter).
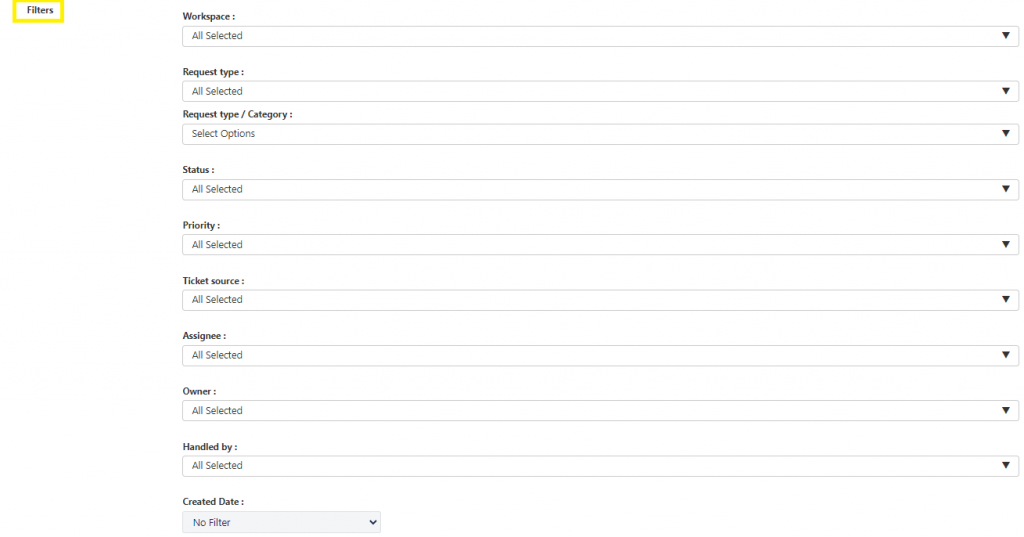
3) Select filters and arrange to filter your data based on:
- Workspace: Select one or more Workspaces. (Admins can view all workspaces, whereas the end users will only be permitted to view the workspaces they have permission to.)
- Request Type: Select one or more Request Types across multiple Workspaces.
- Request Type / Category: Select one or more Types across multiple Request Types.
- Status: Select one or more statuses.
- Priority: Select one or more Priority level.
- Ticket Source: Select Direct, Via Email or Customer Portal.
- Assignee: Select one or more request assignee (can be individual or a group of users).
- Owner: Select one or more ticket owners.
- Handled By: Select one or more users handling the tickets.
- Created Date: Select a specific period or set a period between 2 dates.