If you’re new to SteadyPoint SharePoint Helpdesk App, the first thing you need to learn is how to create a support ticket. This quick guide walks you through the steps:
Ready to try it yourself?
👉 Start your free trial of SteadyPoint Helpdesk and create your first ticket today!
Table of Contents
How to Create a Ticket in SteadyPoint SharePoint Helpdesk App
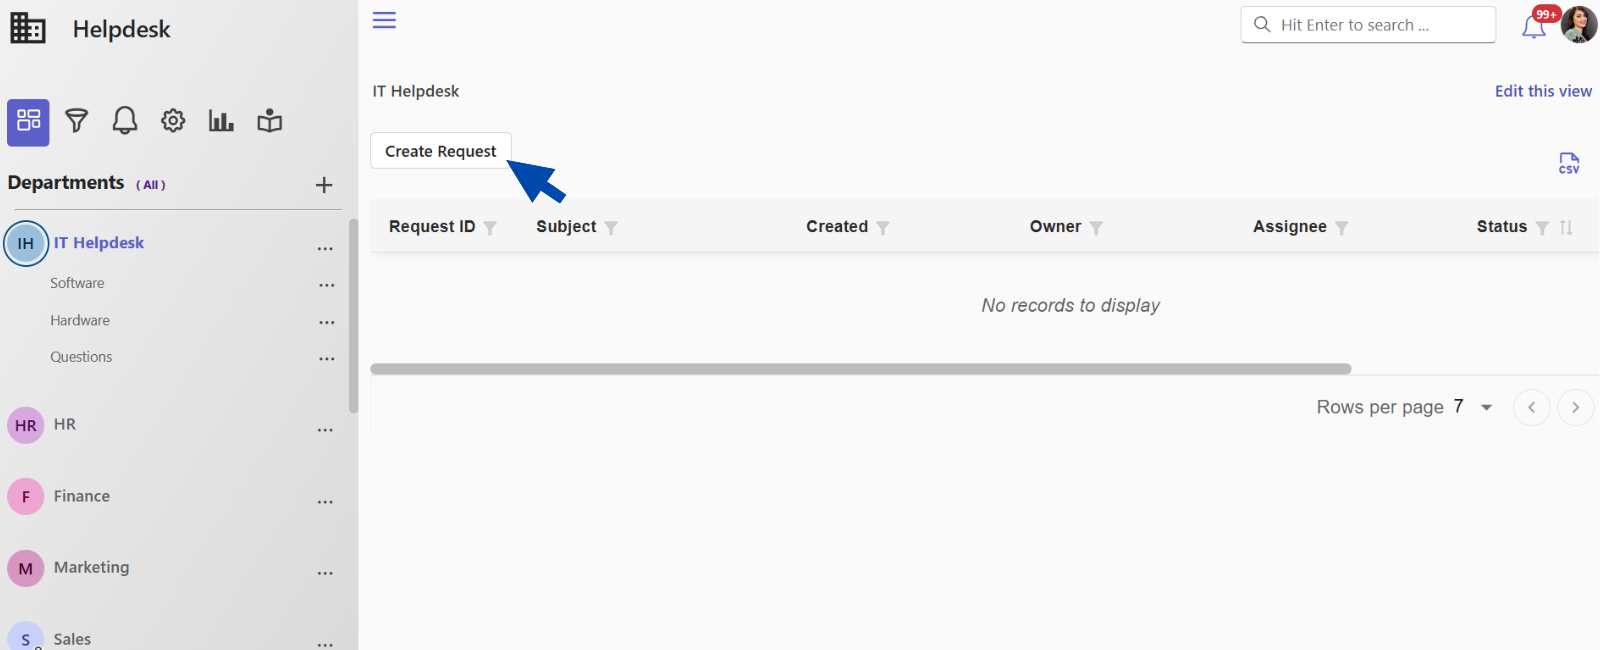
- Open the Helpdesk from your SharePoint site.
- Click “Create Request”.
- Choose the relevant Department and Request Type. If available, select the Category and Subcategory to load the correct form.
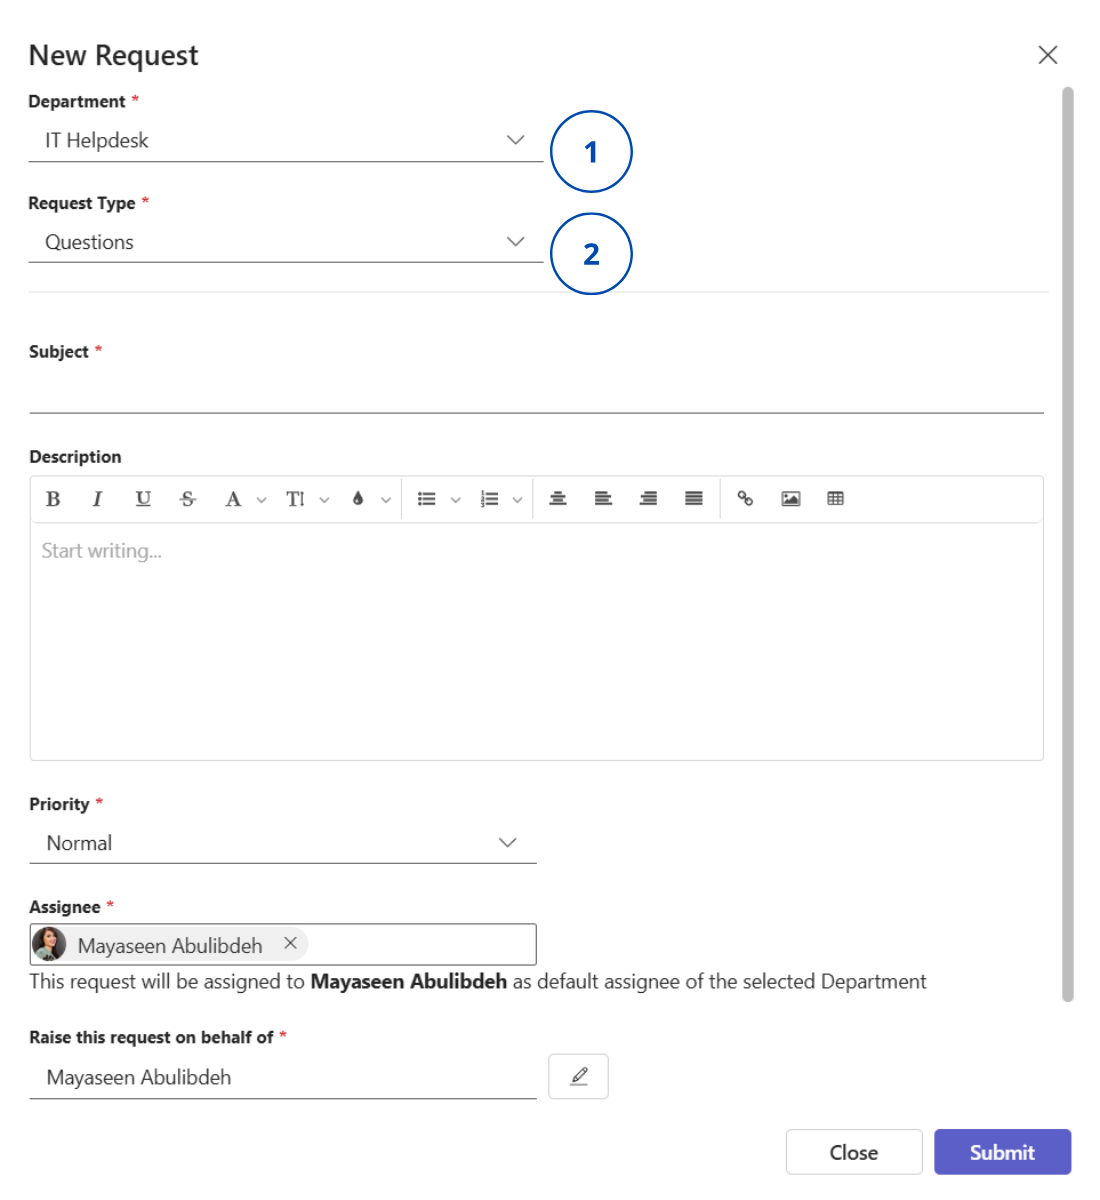
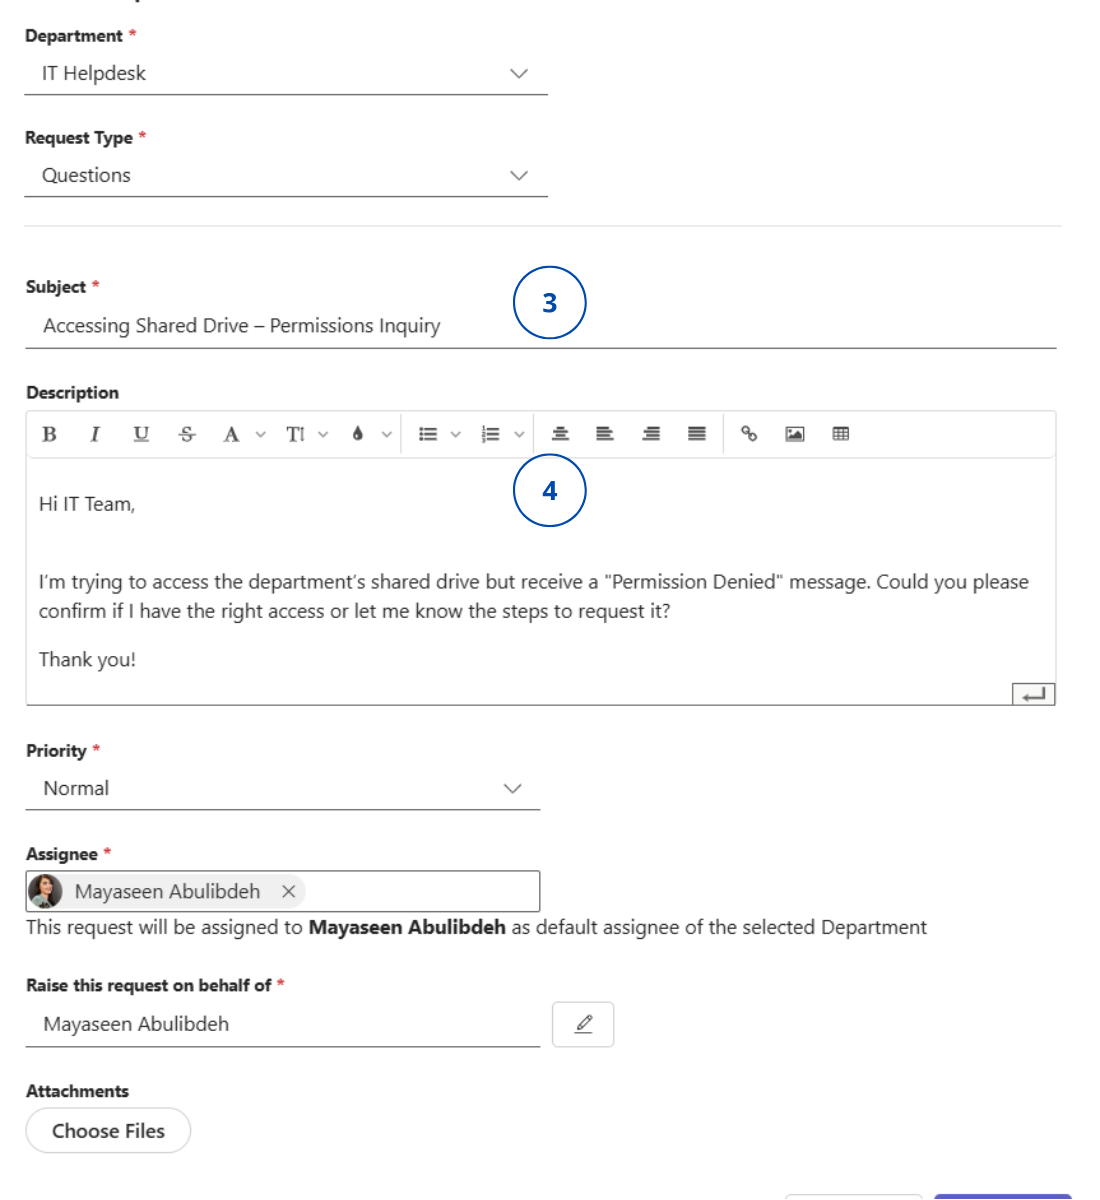
- Fill in the Subject, Description, and any required fields (marked with a red star).
- Check how the Assignee is set:
- In a Private Department, if a dropdown appears, you can manually assign it to an agent.
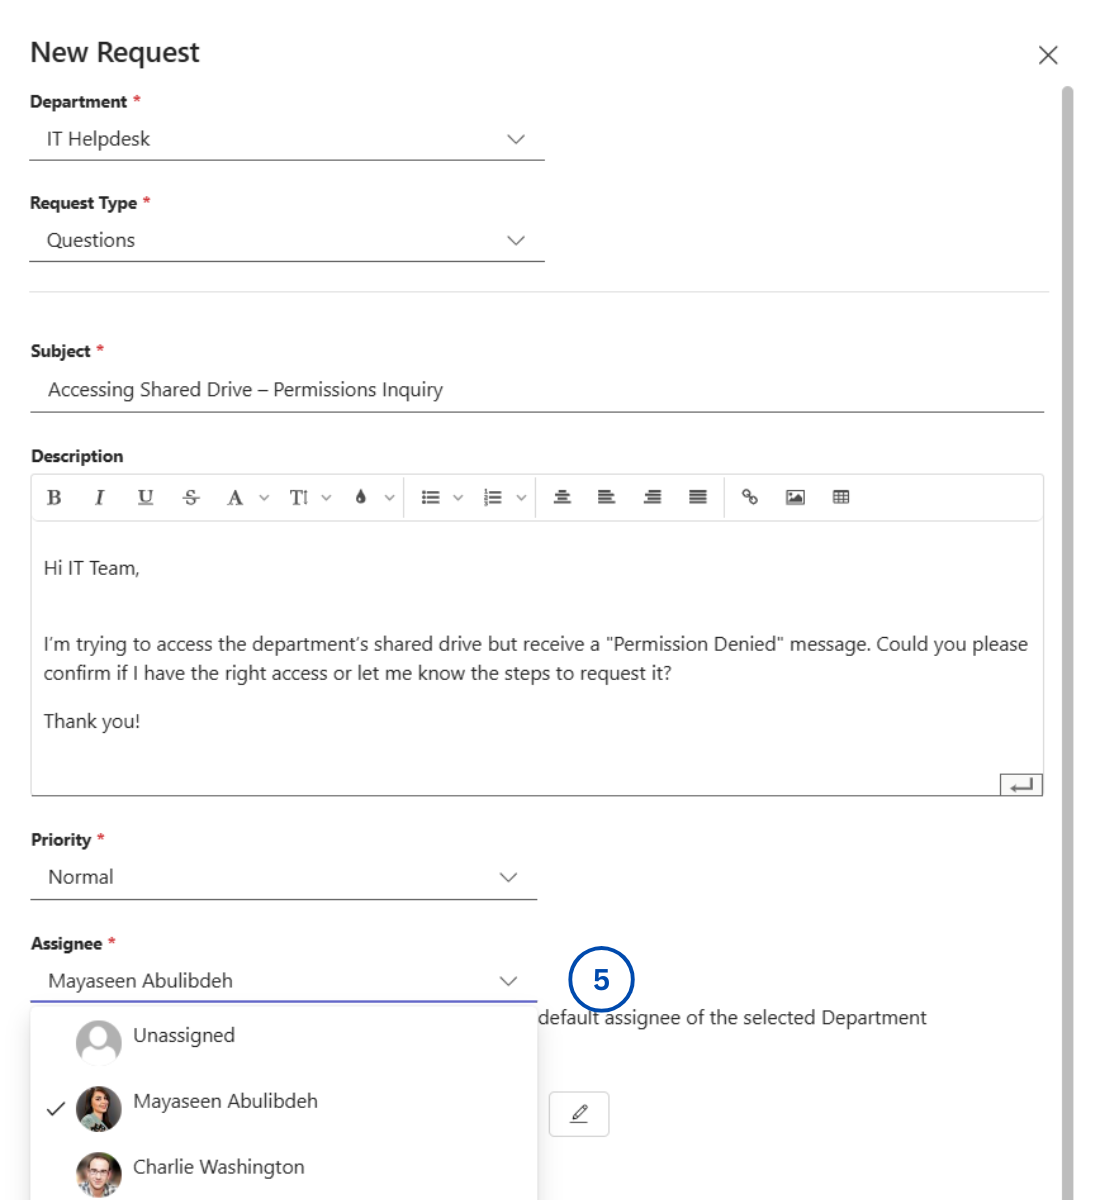
- If not, automatic routing is enabled, and agents will be assigned based on the request type.
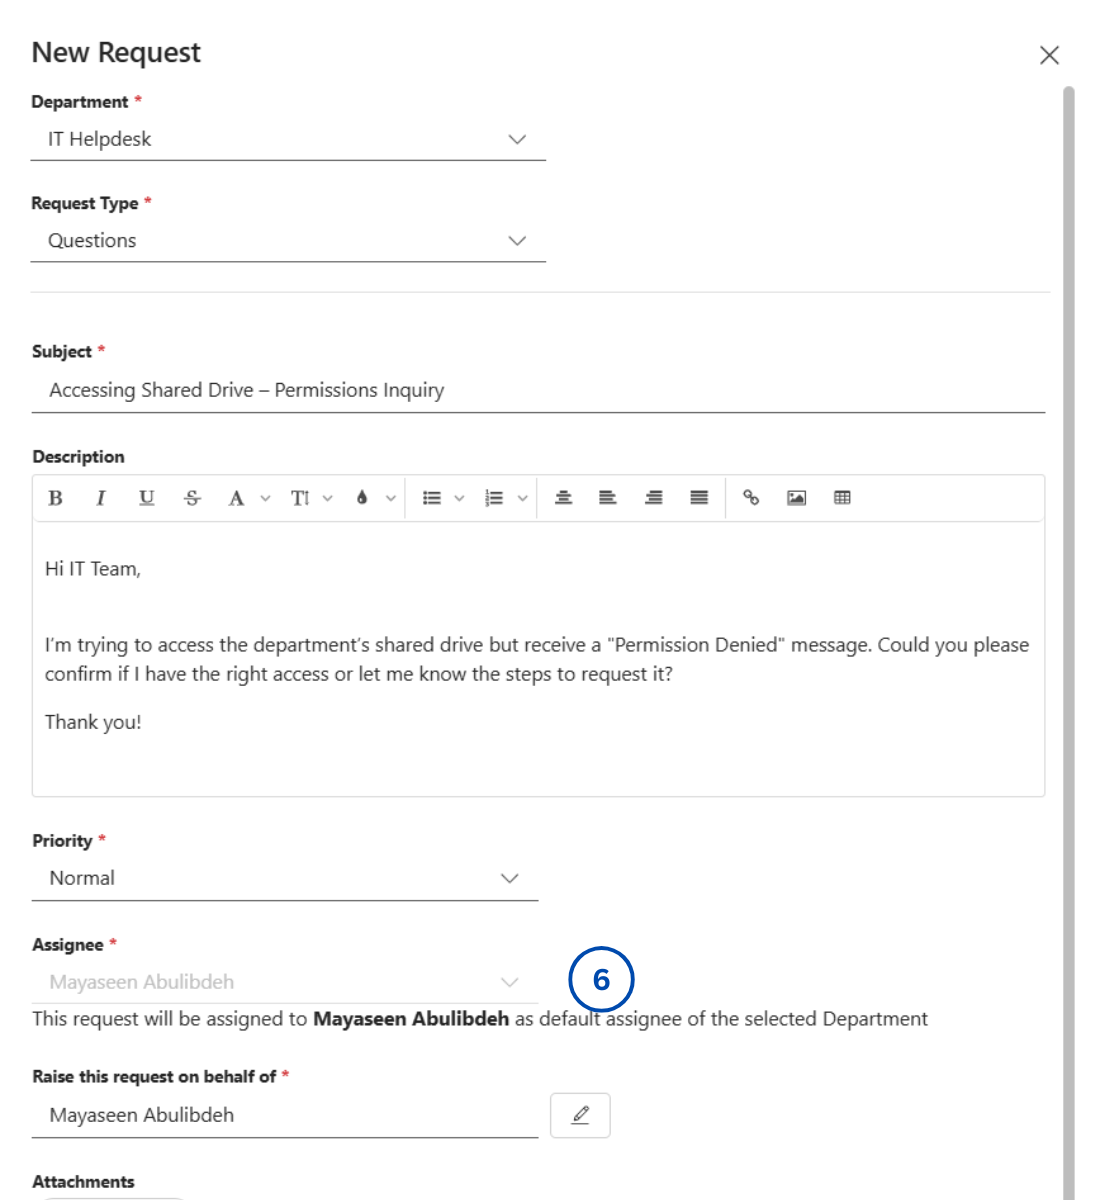
Sometimes, the system automatically selects an assignee by default, but you may still see a dropdown menu. In this case, both automatic and manual assignment are enabled — you can either keep the suggested assignee or choose a different one from the list.
In a public department with manual assignment enabled, you’ll need to type the agent’s name manually — a selection list won’t be available.
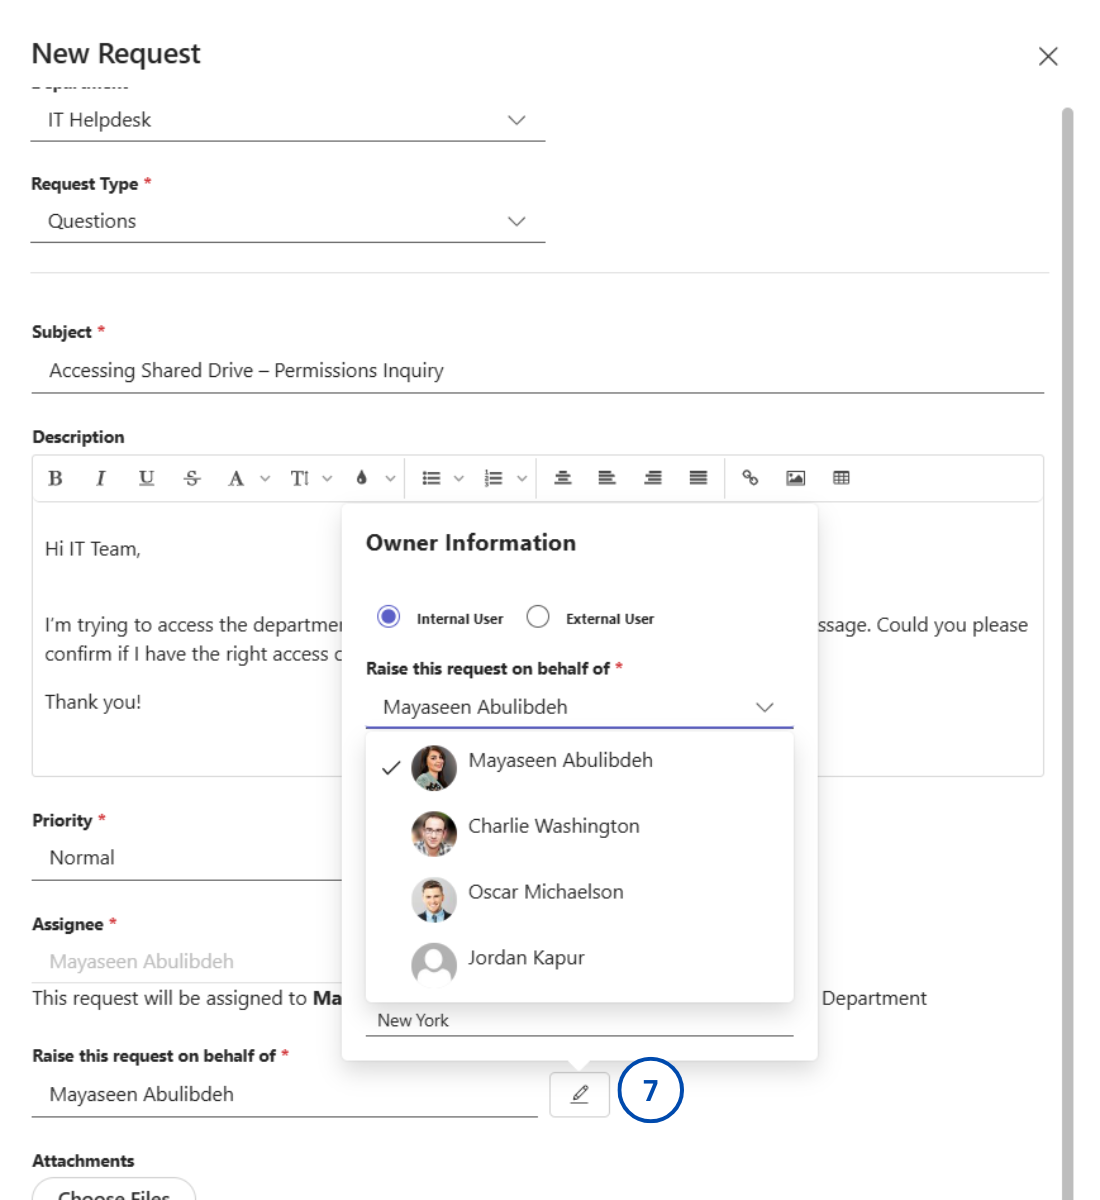
- To create a ticket on behalf of someone else, update the “Raise this request on behalf of” field – this changes the ticket owner, but you remain the author.
That’s it! You’ve submitted your first ticket and are now on your way to resolving issues efficiently.